Are you ready to master the art of selecting the right brisket for your next barbecue? Choosing the best brisket is the first step to achieving that melt-in-your-mouth tenderness every pitmaster strives for. In this guide, we’ll dive into everything you need to know about selecting a brisket that’ll set you up for success, whether you’re a seasoned pro or a backyard beginner.
First, it’s crucial to opt for a full packer brisket that includes both the flat and point muscles. This combination ensures you get the perfect balance of lean and fatty meat, which is essential for flavor and texture. Look for a brisket with Prime grade marbling, as this will provide the juiciest results. The ideal brisket for home smokers should weigh between 8-10 pounds, with a fat cap thickness of 1/4 to 1/3 inch. Remember, an even thickness and some flexibility in the meat are key indicators of freshness and quality.
Trimming and Preparing the Brisket
Now that you’ve selected the perfect brisket, it’s time to move on to the next crucial step: trimming and preparing the meat. Proper trimming is essential to ensure even cooking and enhance the overall flavor of your brisket. Let’s break down this process.
Trimming the Brisket: Start by placing the brisket on a stable cutting surface. For easier trimming, work with cold meat as it’s firmer and easier to handle. Using a sharp knife, begin by trimming the brisket to an even thickness. This step is key to ensuring that your brisket cooks uniformly.
First, remove any excess fat, leaving a fat cap that’s about 1/4 inch thick. This fat layer will render during the cooking process, adding flavor and moisture to the meat. However, be careful not to over-trim, as some fat is necessary for that juicy final product. Additionally, trim away any silver skin—a thin, tough membrane—since it doesn’t break down during cooking and can result in a chewy texture.
Lastly, aim to make the flat part of the brisket more aerodynamic by trimming any protruding edges. This helps the brisket cook more evenly, as thinner parts won’t overcook.
Seasoning the Brisket: Once trimmed, it’s time to season your brisket. A well-seasoned brisket is the foundation of great flavor. Start by applying a binder like yellow mustard or olive oil. This helps the seasoning stick better to the meat.
Next, season the brisket generously with a rub made from salt, pepper, garlic powder, and other spices you prefer. The classic Texas-style rub typically includes just salt and black pepper, but feel free to add other spices like paprika, onion powder, or cayenne pepper for a bit of a kick. Make sure to coat the brisket evenly on all sides to ensure every bite is flavorful.
Marinating the Brisket: For an extra boost of flavor, you can marinate your brisket for a few hours or even overnight. While not mandatory, marinating allows the seasoning to penetrate deeper into the meat, especially if you’re using a rub with sugar or other flavor-enhancing ingredients. Simply wrap the seasoned brisket tightly in plastic wrap or place it in a sealed container and refrigerate it until you’re ready to cook.
Setting Up and Preheating the Smoker
With your brisket trimmed and seasoned, the next step is to prepare your smoker. The way you set up and preheat your smoker will significantly affect the final outcome, so it’s important to get this right.
- Preheating the Smoker: Start by preheating your smoker to a temperature range of 200-275°F (121-135°C). The exact temperature you choose depends on your preferred cooking speed. A lower temperature (around 225°F) will result in a slower cook, allowing more time for the smoke to infuse into the meat. However, a slightly higher temperature can shorten the cooking time without sacrificing too much flavor.
- Choosing the Right Wood: For a rich, smoky flavor, use strong woods like hickory or oak. These hardwoods burn slowly and produce a robust smoke that complements the beefy flavor of the brisket. Avoid softer woods like pine, as they can impart an unpleasant taste to the meat.
- Setting Up the Smoker: Ensure your smoker is clean before you begin. Any leftover grease or residue can cause flare-ups or off-flavors. Once clean, place a water pan in the smoker to maintain humidity during the cook. This helps prevent the brisket from drying out and contributes to a more tender final product.
When placing the brisket in the smoker, position it fat side up or down, depending on your smoker’s heat source. If your smoker’s heat source is from below, placing the brisket fat side down can protect the meat from direct heat and help the fat render properly. Conversely, fat side up allows the fat to baste the meat as it cooks.
Low and Slow Cooking Process
Now comes the heart of the barbecue process—cooking the brisket low and slow. This method is key to achieving that tender, melt-in-your-mouth texture that brisket is famous for.
Smoking the Brisket: Smoke the brisket at a steady temperature, aiming for approximately 1 hour per pound of meat. For an 8-10 pound brisket, this means you’ll be smoking for 6-10 hours, depending on your smoker conditions and temperature.
During the first few hours, the smoke will penetrate the brisket, forming the coveted bark—a flavorful, smoky crust. After about 4 hours, start spritzing the exposed meat edges with a mix of water and apple cider vinegar. This keeps the meat moist and prevents the bark from becoming too hard or dry.
Monitoring Internal Temperature: It’s crucial to monitor the internal temperature of the brisket using a probe thermometer. Insert the probe into the flat muscle, the thickest part of the brisket, for the most accurate reading. Maintain the smoker’s temperature and let the brisket cook slowly until it reaches an internal temperature of 150-165°F (66-74°C). This is when you might encounter “the stall.”
Managing the Stall and Wrapping the Brisket
During the cook, you may notice that the brisket’s internal temperature plateaus and stops rising—this is known as “the stall.” Don’t panic; it’s a normal part of the process.
Understanding the Stall: The stall occurs when the brisket’s surface moisture evaporates, cooling the meat and temporarily halting the increase in temperature. This can last for hours, depending on various factors like humidity, temperature, and the size of the brisket.
Wrapping the Brisket: To overcome the stall, many pitmasters choose to wrap the brisket. Wrapping helps to lock in moisture and speeds up the cooking process by preventing further evaporation. You have two main options: butcher paper or aluminum foil.
- Butcher Paper: Preferred by many for preserving the bark, butcher paper allows the meat to breathe while still speeding up the cooking process. It also helps maintain the bark’s texture while keeping the brisket moist.
- Aluminum Foil: This method, sometimes called the “Texas Crutch,” seals in all the moisture, cooking the brisket faster. However, it can soften the bark, which some might find less desirable.
Before wrapping, you can add a layer of beef tallow to the brisket. This helps maintain moisture and enhances the flavor while preserving the bark’s integrity.
Cooking to Final Temperature: Continue cooking the wrapped brisket until the internal temperature reaches 195-202°F (90-94°C). At this point, the brisket should be tender and ready to rest.
Resting the Brisket
After hours of carefully smoking your brisket to perfection, it’s tempting to dive right in and start slicing. But hold on—resting the brisket is a crucial step that you can’t afford to skip. Proper resting allows the meat to reabsorb its juices, ensuring each bite is as tender and flavorful as possible.
Initial Resting: Once your brisket reaches the desired internal temperature of 195-202°F (90-94°C), remove it from the smoker. Place it on a counter and let it rest uncovered for 20-30 minutes. This initial rest stops the cooking process and allows the surface of the brisket to cool slightly. During this time, the brisket’s internal juices start to redistribute, preventing them from all running out when you slice into it.
Extended Rest in a Cooler: For an even juicier result, transfer the brisket to a cooler for an extended rest. This technique, often referred to as “holding,” helps the brisket stay warm while continuing to tenderize. Place the brisket in the cooler without towels, as towels can cause the brisket to steam, potentially softening the bark too much. Allow the brisket to rest in the cooler until the internal temperature drops to around 140°F (60°C). This slow cooling process ensures that the brisket remains moist and tender, making it easier to slice and serve.
Slicing and Serving the Brisket
The final step in your brisket journey is slicing and serving, where all your hard work pays off. Slicing the brisket correctly is just as important as cooking it properly, as it ensures the meat is tender and easy to eat.
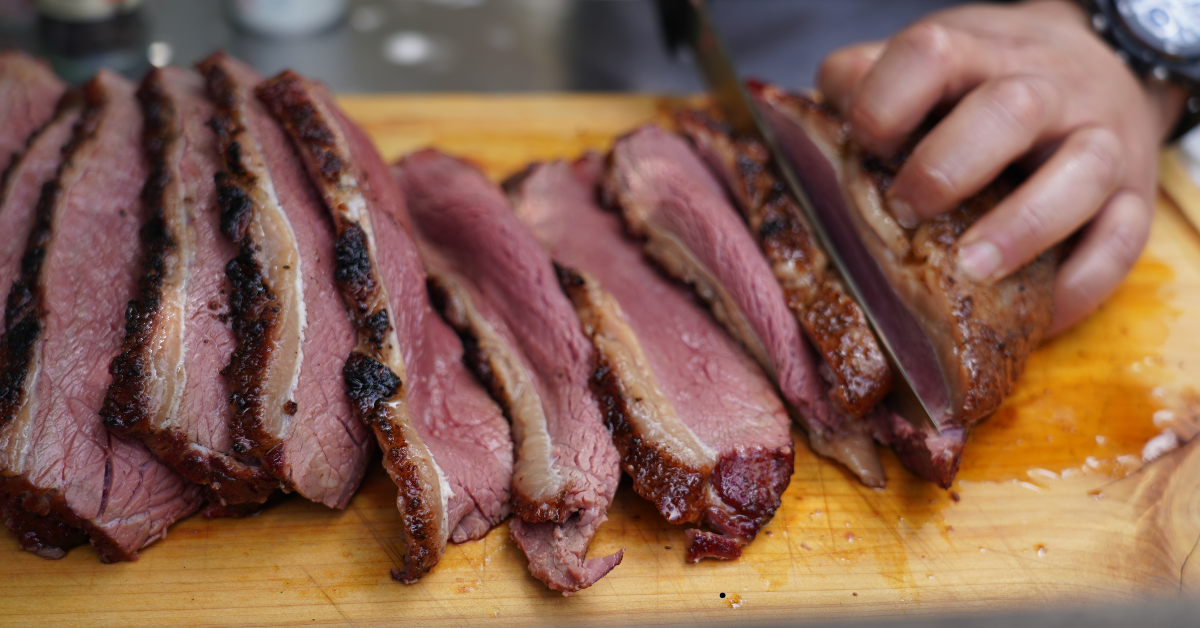
Slicing the Brisket: When it’s time to slice, begin by placing the brisket on a large cutting board. Use a sharp carving knife to ensure clean cuts. Start by slicing the flat portion of the brisket against the grain. This means cutting perpendicular to the lines of muscle fibers, which makes the meat more tender. Aim for slices about 1/4 inch thick—this is the sweet spot for a good balance of tenderness and texture.
When you reach the point muscle, which is thicker and fattier, rotate the brisket and continue slicing. The point can be sliced slightly thicker than the flat, as its extra fat content makes it incredibly juicy and flavorful.
Serving the Brisket: Once sliced, the brisket is ready to serve. Arrange the slices on a platter, making sure the bark is visible—after all, it’s the hallmark of a well-smoked brisket. Serve with your favorite barbecue sauces and sides, but keep in mind that a perfectly cooked brisket can stand alone without much embellishment.